Monday, January 31, 2011

Nonna's Pastina

As a child my mother used to make us the most delightful, yet SUPER easy pastina.   You ask 50 different people how they make their pastina, and you'll get about 50 different answers.  If I could I would bottle my mom's up and sell it - not that it's THAT amazing..but to me and my kids it is.  When we go visit nonna, my kids will ask for pastina and of course I always make sure she makes enough for me too.  I make her recipe at home...but it never comes out quite like nonna's.
  • 5 cups of water
  • 1 Large tomato or 2 smaller tomatoes such as plum tomato
  • 1/2 Sweet onion
  • 1/2 Celery stalk
  • Small handful of parsley
  • 1 Tbsp. Olive Oil
  • Salt 
  • Pepper
  • Pastina
  • Grated Parmesan Cheese
  1. In a small sauce pan add all the ingredients except pastina and parmesan cheese
  2. Bring the ingredients to a boil
  3. Let boil for at least 25 minutes - all the vegetables should be cooked through and falling apart (I've let it go for almost 45 minutes once...it can't hurt it)
  4. Remove vegetables from sauce pan and add about 1/2 cup - 3/4 cup pastina (I had a little more pastina since my kids love the pastina)
  5. Cook pastina for about 5 minutes and remove from heat
  6. Serve with a little grated Parmesan cheese sprinkled on top

Tuna & Artichoke Panini

I own a few Giada De Laurentis cook books - most of which are signed thanks to my wonderful mother-in-law Marie who has spent many hours on line to have a face to face with Giada.  I love her recipes since they are so close to home and all so very simple. I was at the market today and saw the most gorgeous loaf of ciabbata bread.  It just looked so inviting! I had this Tuna Artichoke Panini recipe that I loved which is inspired by Giada's recipe (which you can find by clicking HERE)...mine doesn't use Olives since the husband isn't a fan.  Now, I haven't tried her actual version..but mine is pretty darn good!  You'll be surprised at how easy this is! This recipe serves 2...you may get 4 servings but we REALLY liked it :-)

  • 1/2 Can Chick Peas, drained
  • 2 Tbsp. Extra Virgin Olive Oil
  • 1 Garlic Clove (more if you are a fan!)
  • 1/2 tsp. Lemon zest
  • 2 Tbsp. Mayonnaise
  • 1 Can of Italian Tuna, such as Cento
  • 1/2 Can Artichoke Hearts -or- 1/2 jar marinated artichoke hearts, chopped
  • Arugula
  • Plum Tomato, sliced and salted
  • 1 Lemon
  • Salt
  • Pepper
  1. In a small food processor combine chick peas, olive oil, garlic and lemon zest until smooth. If you find it to be too thick, add a little more olive oil
  2. Add mayonnaise and blend until well blended
  3. In a small bowl, combine tuna and artichokes - if you use tuna in water or canned artichoke hearts you may need to add a little olive oil to this so that it isn't too dry
  4. Add juice of half of a lemon, salt and pepper to the tuna artichoke mixture
  5. Cut yourself a nice piece of ciabbata bread and spread your chick pea mixture liberally on both sides
  6. On one slice, place 3 slices of tomato and a few leaves of arugula 
  7. Place a heaping spoonful of the tuna artichoke mixture on top of this, top with the other piece of bread and....ENJOY!!!
I served this with sliced tomato drizzled with a little olive oil and seasonings - such a light and refreshing meal!


Sunday, January 30, 2011

Patrizia's Simple Risotto

I will be the first to admit that Risotto scared me.  After watching countless episodes of Gordon Ramsey's Hells Kitchen who wouldn't be? But when you look at it, Risotto is simply rice and a liquid (I mainly use Chicken Broth) with a few little extras. So, I figured I would give a shot and once I started I haven't been able to stop!
Risotto should be firm, but not crunchy - I guess you can say Al-dente.  It also shouldn't stick or clump together.  In my recipe I use bouillon cubes to make my own chicken broth.  I've made it using canned chicken broth and I didn't really care for it...it tasted to chicken-y.  Anyway... It's not as hard as you think...trust me!
  • 6 cups of water
  • 2 1/2 Chicken flavored bouillon cubes
  • 1 1/2 Cups of Arborio rice
  • 1/2 Vidalia or Sweet Onion finely diced
  • Butter
  • Olive Oil
  • 5 Quart Saute Pan
  1. Add bouillon cubes to 6 cups of water to make chicken broth, boil and remove from heat
  2. Heat 3 Tbsps. (or so) of butter and oil in saute pan
  3. Add chopped onion and cook till translucent
  4. Add Arborio rice to the pan and saute until SOME of the rice turns light brown - you don't want to brown all the rice..once you see a few pieces turning light brown move on to step 5
  5. Now the fun part...add 1 cup of your chicken broth to your rice and stir until the broth is absorbed, then add another cup and stir...you will repeat this process at least 5 times.  
  6. Risotto cannot be left unattended - if the liquid gets absorbed and you aren't there to add more liquid it can easily scorch
  7. Now that you are about 5 cups in it's time to taste it.  Your risotto should not be to thick or starchy (browning it properly will help alleviate that)
  8. I am usually done after 5 cups of broth - however I make 6 cups just in case it needs a little more liquid
  9. If you taste it and find that it's still a little crunchy and the liquid has been absorbed, add a little more broth - about 1/2 cup at a time
  10. I guess this is where it can get tricky - but once you get the hang of it you can eyeball it and 'just know' when it's done
  11. Remove your risotto from heat - you can now add a little grated Parmesan cheese if you'd like.  In this recipe I do not.  I have a few other variations that I make - Mushroom, Shrimp, and Cheesy Parmesan  to name a few - You'll have to wait for those :-)

Cousin Joey's Chicken Francaise

Cousin Joey is my Zia (aunt) Dina's son.  Zia Dina is an AMAZING cook!  She makes pasta from scratch, makes homemade pizza dough that is phenomenal. So the fact that Joey loves to cook doesn't surprise us - the apple doesn't fall far from the tree.  Joey has a signature dish...his Chicken Francaise.  This is a staple during a family get together.  The challenge with this recipe is that we have no exact measurements.  This is the case with almost all our recipes.  We cook to taste.  He gave me a list of ingredients and directions (a bit time consuming, but the pay off is HUGE) and I took a stab at the measurements.  Well, I have to say my version was a BIG hit.  I served 2 pounds of chicken to 3 guests and there was nothing left.  Without further ado...the recipe:

  • 2lbs of Chicken breast or thin sliced chicken breast
  • 2 eggs
  • 2 Cup Seasoned breadcrumbs*
  • 1/4 Cup Parmesan cheese
  • 3-4 Garlic cloves
  • 1 Chicken flavored bouillon cube
  • 1 Lemon - cut in half
  • Butter
  • White wine
  • Olive Oil
  • Salt
  • Pepper
  • 5 quart saute pan
  1. Rinse off your chicken breast 
  2. If you are using thick chicken breast, you want to slice the chicken breast in half - but if you want to save yourself ALOT of time, buy the thin sliced!
  3. Pound out the chicken breast so that its nice and thin, like a scallopini.  I cut them in half after this point, sometimes in thirds if its a really big piece
  4. Once you've finished, place the chicken in a large bowl and add about 1/2 cup white wine - let this sit for at least a half hour
  5. Now that your chicken is nice and drunk it's time to bread and fry
  6. Layout your chicken on a large flat area lined with paper towels - you want to get rid of any excess moisture
  7. While the chicken is laid it, sprinkle with salt and pepper
  8. Beat two eggs in a medium bowl and add the chicken, make sure you evenly coat all the pieces - I just used my hand to work the egg through
  9. In a shallow dish add your breadcrumbs and Parmesan cheese. Now..here is another little twist - we use homemade breadcrumbs.  They are MUCH lighter than store bought and taste completely different. I'll write more about this later..but for now mix the breadcrumbs and cheese together.
  10. Coat your saute pan with olive oil, once the oil is hot add your chicken about 4 pieces at a time - be careful not to overcrowd your pan
  11. Lightly brown the chicken, about 2 minutes on each side (you will continue to cook the chicken later)
  12. Once you are done cooking the chicken, cool and wipe down your pan
  13. Return your pan to the stovetop and olive oil - enough to coat the bottom of the pan entirely
  14. Add 4 Tbsp. of butter - yes, I know it's alot...but it's going to make your sauce so decadent
  15. Smash your garlic using the flat side of a meat tenderizer or large knife - add this to your pan - INCLUDING the garlic skin (yes, I said to add the skin it takes any bitterness of the garlic away - at least that is what Zia says)
  16. Once the garlic turns a light golden brown, add about 3/4 cup of wine, the bouillon cube and the juice of 1/2 lemon
  17. Bring to a boil, add the chicken and 4 slices of lemon
  18. Reduce the heat to medium low
  19. Cook covered for 20 minutes, turning the chicken over after 10 minutes
  20. When done, place the chicken on a serving platter, pouring the remaining sauce (including lemons & garlic) over the chicken
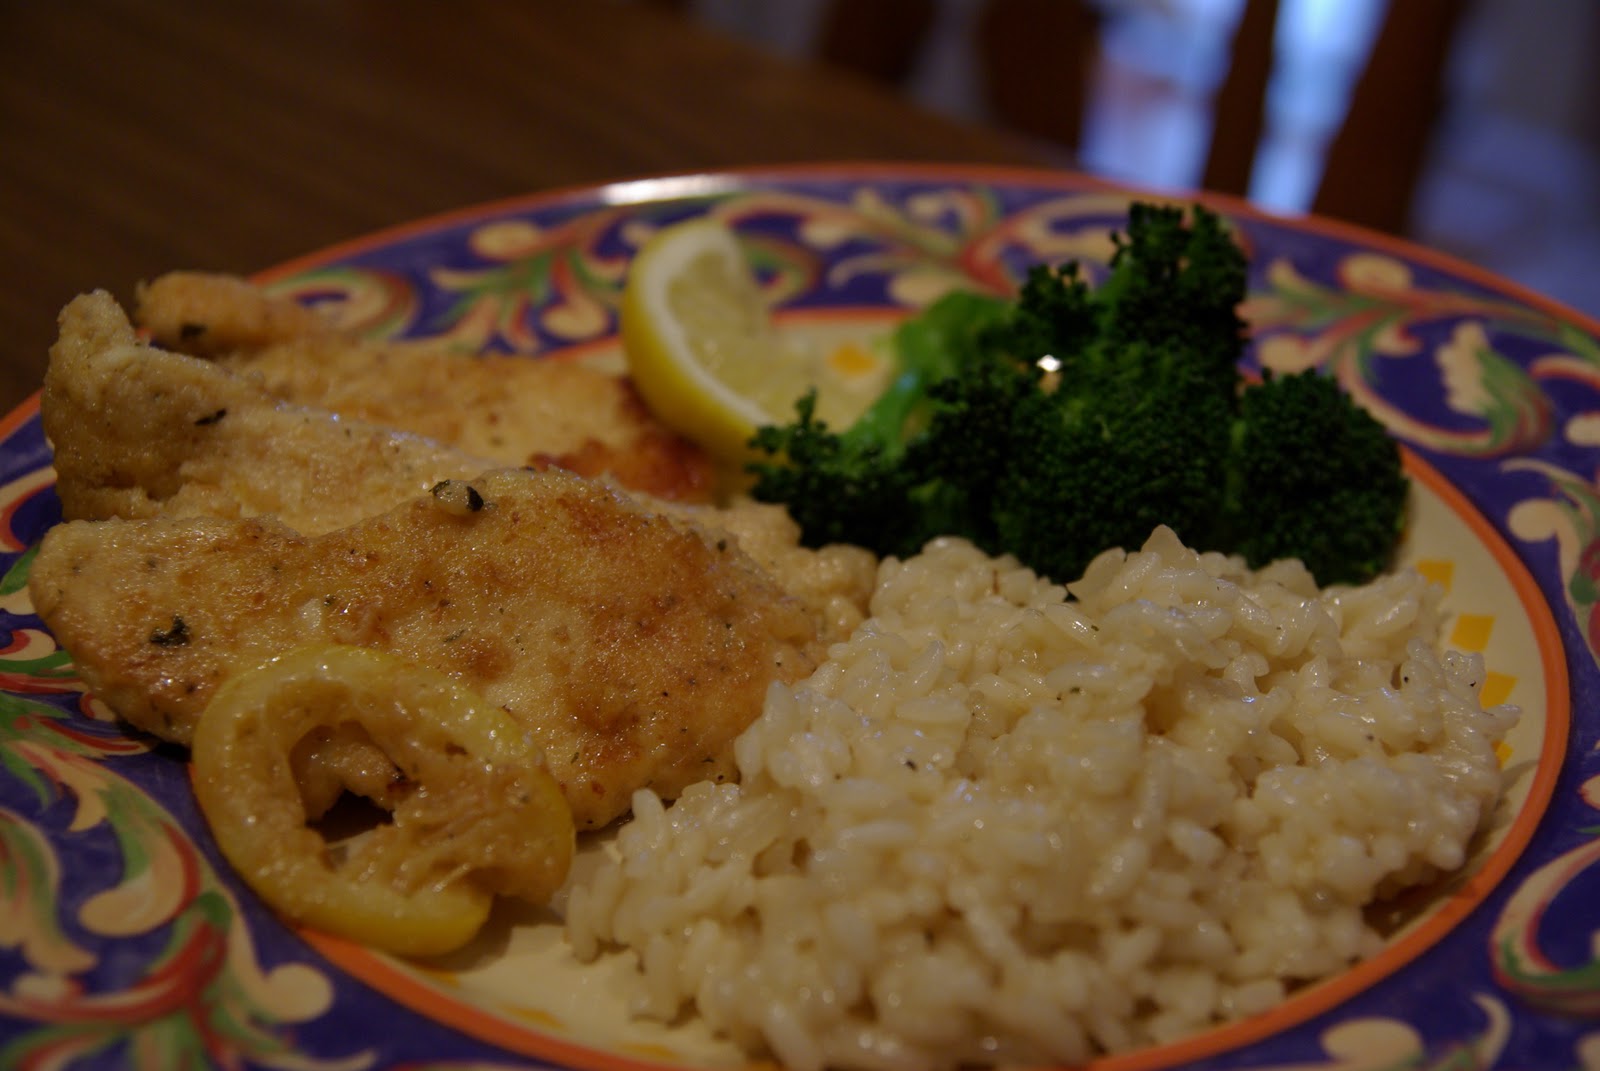
If you did this right, some of the chicken will have a nice little crust on it!  I know there are alot of steps here but that is partly my fault - I want to make it as detailed and as easy as possible.  I served this with my Simple Risotto and it was a hit!


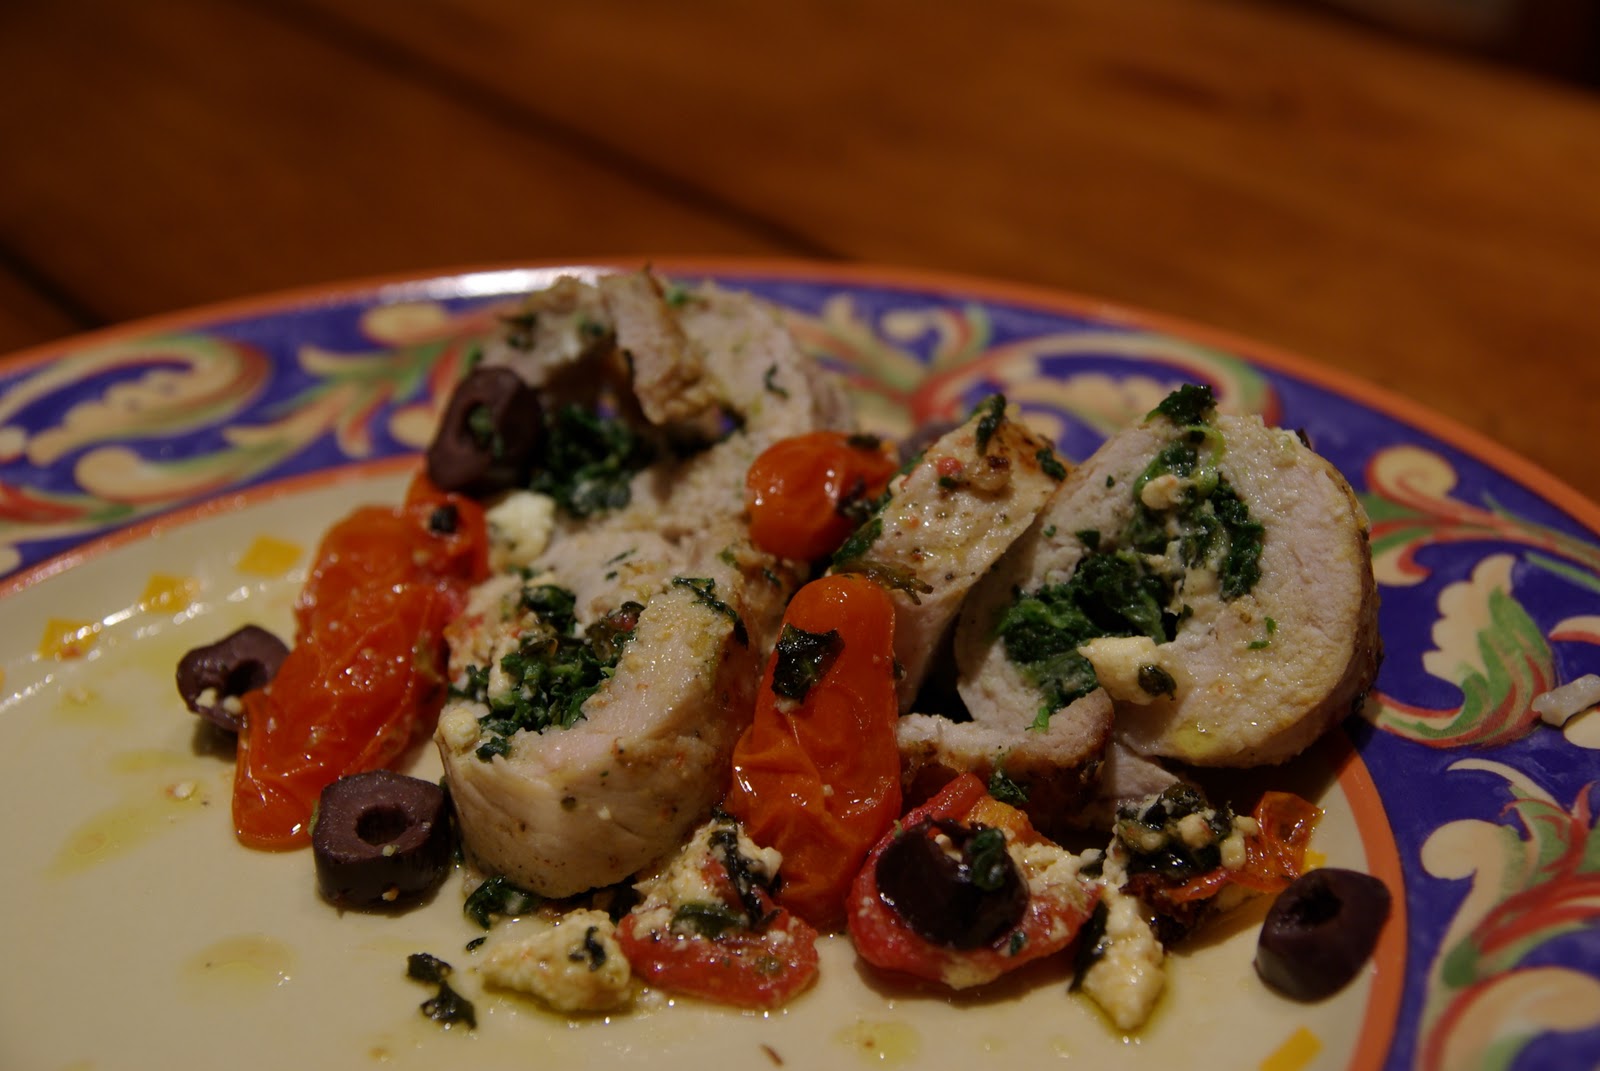
*Now before I forget, I want to talk to you about breadcrumbs.  I will always have a container of seasoned breadcrumbs in my pantry....it's a staple.  But there is NOTHING, I repeat NOTHING like homemade breadcrumbs. Just take a look at the chicken in the above picture..you can just tell that it's delicate.

Homemade Breadcrumbs

You can do this one of two ways, you can make your way to your local bakery and purchase them there OR do it yourself.  If you use Italian bread at home save any of your leftovers.  My mom keeps leftover bread in the oven in one of those disposable aluminum trays.  Once you get enough to fill the tray it's time to take out your Cuisinart.  Add dried bread to the Cuisinart adding fresh parsley and grated Parmesan cheese.  I don't have measurements for this - you'll need to adjust the parsley and cheese to your taste.  Now chop.  Continue to chop until you get the consistency you like.  Viola, homemade breadcrumbs.  Since this has cheese in it, you will need to refrigerate it.

Sicilian Citrus Salad

This salad brings back so many great memories!  My mother makes this in the summer when the oranges are nice and sweet.  Now, I've had this during my trips to Sicily and well, you just can't compare.  The oranges are sweeter, the oil is tastier and the oregano - well don't get me started.  I still use oregano that we bring over from Sicily.  What I've found in stores cannot compare.  There are a few variations you can make..like using blood oranges or adding lemons.

  • 6-8 Ripe oranges
  • Olive Oil (not extra virgin)*
  • Salt
  • Pepper
  • Sugar
  • Water
  • Oregano
  1. Peel & Segment Oranges - you can also peel and quarter them if you don't want to segment
  2. In a bowl, add oranges, olive oil, salt, pepper, oregano, a pinch of sugar and a little bit of water (I'd say about 2 Tbsp.)
  3. Variation - Meyer lemons make a very welcome addition to this.  You would peel and segment the lemon and either add them in their entirety or you could just squeeze some fresh lemon juice over the oranges.

* I suggest using regular Olive Oil since you don't want to over power the taste of the oranges by using Extra Virgin Olive Oil.  The darker/greener the oil..the stronger the taste is.

Saturday, January 29, 2011

Coconut Chicken Fingers

I follow Lisa's Cooking Adventures on her blog .  She recently posted a challenge - She has 25 recipes from Cooking Light and was looking for people to pick a recipe, make it and give her a review.  I took a look at the recipes and decided on the Coconut Chicken Fingers.  I thought it was easy and something the kids would like.  I have to say that I was pleasantly surprised considering this is a 'light' recipe.

Here is the review I wrote up for Lisa's Blog:

I was excited to see a recipe for Coconut Chicken Fingers as part Lisa's Cooking Adventure's Challenge. I figured it was an easy dish that my kids would like. I have to say I was a little worried that the coconut would burn too fast - but that wasn't the case. I followed the recipe using Perdue Chicken Tenders, I omitted the red pepper since I was serving it to the kids and I used plain flour instead of rice flour. It was a BIG hit. We had them for lunch served with Kikkomann's Plum Sauce. If I wasn't serving them to the kids I would have added a little red pepper since I do think it needed that extra 'punch'. However - this was a very simple recipe to make and it got thumbs up from the family!


And not a moment longer...the recipe:
  • 4 (6 ounce) skinless, boneless chicken breast halves, cut into 1/2 inch-thick strips (I used Perdue Chicken Strips - saved a lot of time!)
  • 1/2 tsp. salt
  • 1/4 tsp. ground red pepper (omitted since I was feeding the kids)
  • 1 cup rice flour (I used all purpose flour)
  • 1 cup whole buttermilk
  • 1 large egg
  • 1 1/2 cup cup unsweetened flaked coconut
  • 3 Tbsp. canola oil
  • Sweet chili sauce (optional - I used Kikkomann Plum Sauce)
  1. Sprinkle chicken with salt and pepper
  2. Place flour in shallow dish
  3. Combine buttermilk and egg in shallow dish, stirring well
  4. Place coconut in shallow dish
  5. Dredge chicken in flour, shake off excess
  6. Dip chicken in egg mixture
  7. Dredge in coconut
  8. Heat large skillet over medium heat
  9. Add oil to pan, swirl to coat
  10. Add chicken to pan
  11. Cook 6 minutes or until done, turning golden brown
  12. Serve with chile sauce, if desired


Spinach & Feta Stuffed Pork Chops

I love making this dish.  It is so easy and full of goodness! I use Greek seasoning sold by Penzys.  I was introduced to Penzys by my husband and I have to say they offer such a great variety of spices / herbs / rubs/ etc.. My pantry is full of dozens of their spices.  If you haven't heard of them, let me be the first to introduce you!

  • 6 Boneless pork chops
  • 1/2 cup of crumbled Feta cheese
  • 2 cups of chopped spinach (well drained)
  • Penzys Brand Greek Seasoning*
  • Olive Oil (not extra virgin)
  • Handful of grape tomato, sliced in half
  • 1/4 cup Kalamata Olives, chopped
  • Toothpicks
  • Non-stick frying pan
  • Oven safe serving dish
  1. Preheat oven to 375 degrees
  2. Layout your pork chops between 2 layers of wax paper and flatten them using the flat side of a meat tenderizer
  3. Once you have flattened them all, place your pork chops in a shallow bowl - drizzle with some olive oil and season using the Greek seasoning
  4. Let the chops sit for about 1/2 hour (this isn't absolutely necessary - but marinating it even this long helps enhance the flavor)
  5. Lay out your seasoned pork chops and top with your well drained spinach and then sprinkle with Feta cheese -  use as little or as much as the size of your chop and your taste allows
  6. Fold both sides up and secure with toothpicks
  7. Drizzle olive oil into your heated frying pan until it is well coated
  8. Place individual chops in frying pan toothpick side up
  9. Continue to cook the chops until all sides are golden brown 
  10. As the chops finish cooking, place them in an oven safe serving dish
  11. Add the sliced cherry tomatoes and Kalamata olives to the serving dish, drizzle with a little olive oil and place in the oven for about 20 minutes to continue cooking the chops through
*If you can't get your hands on Penzys Greek Seasoning , you can use a blend of Oregano, Lemon Pepper, Salt, Garlic & Marjoram