Thursday, February 24, 2011

Steak, Peppers & Potatoes!!!!

The husband put a request in the other night for steak.  We both love it...but don't eat it that often in the winter that often.  We never brought the grill onto the deck and with all the snow we've had there was no way I was trekking out to bring it on the deck.  So...I figured I'd make the steaks in the grill pan. I had some red and orange peppers that I had picked up at the farmer's market and knew they'd go great along with the steak. I through in some garlic potatoes for good measure!

Steak
  • 2 Petite Sirloin Steaks
  • Salt
  • Pepper
  1. Season steaks with salt and pepper on each side
  2. Place on very well heated grill
  3. Cook about 7 minutes on each side for medium/rare steaks
  4. Set them aside to rest before eating
Peppers
  • 3-4 Red, Orange, Yellow Peppers (I am not a fan of green peppers)
  • 1 Medium Onion
  • Salt
  • Pepper
  • Olive Oil
  • Butter
  1. Slice up your peppers and onions
  2. In a large heated fry pan add a few pats of butter and some olive oil
  3. Add your peppers and onions
  4. Season with salt & pepper
  5. Fry them until the onions and peppers have browned up a little bit
Potatoes
  1. Lightly coat the bottom of a baking sheet with olive oil
  2. Place potatoes on baking sheet
  3. Sprinkle with salt and the Tastefully Simple Garlic Garlic
  4. Bake in an oven heated to 400 until golden brown


Chicken Cordon 'Azzurro'

I remember reading a cook book my mom had gotten in the mail.  She got 2, a blue one that was French and a red one that was Italian.  These were the only ones she owned but never used.  I remember looking through those books over and over.  In the French cookbook there was a recipe for chicken cordon bleu.  I remember thinking - yum that looks SO good...maybe that is where my cooking bug came from???  Well, years later I made it..but used provolone cheese since I am not a fan of swiss. It's easy and very tasty!  I served it with 2 of my favorite weeknight shortcuts - Uncle Ben's Rice and Steamed Broccoli with some olive oil and lemon drizzled on top (forgot the brand - but the one you steam in the bag). 
  • 4 Thin Sliced Chicken Cutlets
  • 8 pieces of ham
  • 8 pieces of provolone cheese
  • Seasoned breadcrumbs
  • 1 egg
  • Salt 
  • Pepper
  • Olive Oil
  • Butter
  • Toothpicks
  1. Preheat oven to 350 degrees
  2. Pound your chicken cutlets to make them a little thinner
  3. Season the cutlets with a little salt and pepper
  4. Add 2 slices of ham, then 2 slices of cheese on top of each cutlet
  5. Roll the cutlet - if one end is more narrow, start with that end first
  6. Secure the roll with toothpicks - I usually use 4 (try to use the same amount for each roll - so you know how many toothpicks you have to pull out!)
  7. Continue with the remaining cutlets
  8. In a small bowl beat one egg
  9. Dip each roll in the beaten egg and then roll it in the seasoned breadcrumbs
  10. In a large heated saute pan, add olive oil
  11. Once the oil is nice & hot - add the chicken
  12. Brown each side - then remove from heat, you will continue to cook in the oven
  13. Place all 4 rolls in an oven safe dish and cook in the oven for about 25 minutes 


Sunday, February 20, 2011

I'm famous!

Head over to Lisa's Cooking Blog - She made one of my recipes (Spinach & Feta Stuffed Pork Chops) as part of a cooking challenge!  I am glad that she enjoyed it!

Saturday, February 19, 2011

Eggplant Parm Stackers

I don't like Eggplant Parmesan....there I said it. I don't like Eggplant and I don't like foods that are mushy - unless it's a food that is suppose to be mushy..like bananas. But...my husband likes it.  So I thought 1.  I have to find a way to make individual servings and 2.  Find a way to make eggplant parm so that the eggplant wasn't as mushy.  I think I succeeded with my eggplant parm stackers!  I bake them using Panko - I think this helps in keeping them crispy and not as mushy!  Try these for yourselves...SO easy and pretty good - this coming from someone who isn't a fan of eggplant!
  • Eggplant
  • Sauce - I make my own
  • Ricotta Cheese
  • Mozzarella Cheese
  • 2 Eggs
  • Panko
  • 2 Tbsp. Parmesan Cheese
  • 2 Tbsp. chopped Parsley
  • 1 Tsp. Garlic Powder
  • Cooking Spray
  • Salt
  • Pepper
Preheat oven to 350 degrees

Eggplant
  1. Slice the eggplant into 1/4 inch slices - I keep the skins on, this is a personal preference..you can also peel
  2. In a large bowl, soak the eggplant in salted water
  3. Soak for about 5 minutes then remove - this will help remove some of the bitterness
  4. Lay the eggplant down on a tea towel and let them dry
  5. Sprinkle with salt and pepper
  6. In a bowl scramble the eggs together - you will now get ready to bread the eggplant
  7. In a separate bowl combine your Panko breadcrumbs, chopped parsley, garlic powder and Parmesan cheese (they do make Italian Seasoned Panko breadcrumbs...but I like to make my own)
  8. One by one, dip the eggplant into the egg mixture making sure you remove excess egg, then coat in Panko set aside until you have breaded all your eggplant
  9. Spray a baking sheet with cooking spray
  10. Place the eggplant slices on the baking sheet and cook for about 20 minutes - 10 minutes on each side
  11. When done, place them aside.

Stacking your Eggplant
  1. In a baking dish, aluminum pan, etc..spoon in enough tomato sauce to coat the bottom
  2. Place about 6 slices of eggplant down
  3. Layer with:
    • A spoonful of ricotta cheese
    • A spoonful of sauce
    • 1 slice of mozzarella cheese
  4. Add your next slice of eggplant and then add another layer of ricotta cheese, sauce and top with a slice of mozzarella cheese
  5. This completes your stack - now finish the rest.  I usually get about 10 stacks with a normal size Eggplant
  6. Before placing in the oven - spoon some sauce over the top
  7. Cook for about 20 minutes on 350 degrees or until cheese is nicely melted


Yummiest Meatloaf Ever!

I love meatloaf.  I love my mom's meatloaf.  She makes it with roasted tomatoes, peas, potatoes and it's delicious.  I've tried to re-create hers many times, but like a lot of things my mom makes - I can't get it quite right.  Anyway..I figured I would just give it a shot and make it my way.  So I threw in a little bit of this and a little of that and viola - Yummiest Meatloaf Ever!  I've been making it this way for a long time and have had no complaints - even the kids eat it up (with some ketchup on the side)!
  • 1 lb. Meatloaf Mix (can also use Turkey)
  • 2 eggs
  • Italian Seasoned Breadcrumbs
  • Ketchup
  • Lipton Beefy Onion Mix
  • Pepper
  • Olive Oil
  • *Tastefully Simple Garlic, Garlic (not necessary, but I like it!)
  1.  In a large bowl, combine Meatloaf, Lipton Beefy Onion Mix, some ground pepper and eggs and mix it by hand until the eggs have been evenly mixed in
  2. Add Ketchup - I would say 3-4 Tbsp. - I usually just squirt it in eyeballing it, mix by hand until ketchup is thoroughly blended in
  3. The meat mixture will be moist 
  4. Now you will add in the breadcrumbs - add small handful at a time until you get to the right consistency.  What is the right consistency?  Well...you don't want it too moist because it won't hold it's shape and you don't want it too dry since it will be, well dry.  You'll know when you have put in enough breadcrumbs.
  5. In a baking pan pour in enough olive oil to just coat the bottom
  6. Add Meatloaf, shape it into a loaf and cook for about 1 hour on 350
  7. **I like to put a little "glaze" on it.  I mix ketchup, a little bit of olive oil and some Tastefully Simple Garlic Garlic in a bowl.  When you have about 10 minutes left to bake, spread this mixture on the top of your meatloaf - DELICIOUS!!!!


Thursday, February 17, 2011

And my husband made me this......

Remember how I said my husband can cook...well he outdid himself the other night.  He has a way with spices and vegetables. He makes them so tasty even I eat them all!  Well the other night he made a nice fish dish.  It was Tilapia with a beautiful mixture of vegetables.  There was celery, red, orange, & yellow peppers, onions, carrots, yellow squash, white beans, zuchinni, and .. well I think that was it.  He sauted these with some olive oil, butter, salt, pepper and lemon.  He said something about a mirepoix - and I just looked at him wondering when he turned into Jacques Pepin.  All I know is that it was delicious!

Shrimp Scampi Pasta!

This is a quick, real quick week night meal.  I love it for a few reasons - my kids love shrimp and I can make it using only two pans -  so clean up is easy! As with alot of my recipes I don't have exact measurements but have done the best to give you an easy to follow recipe!
  • 1 dozen medium size shrimp (cleaned/de-veined)
  • Butter
  • Olive Oil
  • Parsley
  • 2-3 cloves garlic minced, crushed, thin sliced - whatever you desire!
  • Lemons
  • White Wine
  • Angel Hair Pasta
Pasta
  1. In a large pot, prepare water for the Pasta
  2. While the water is getting to a boil prepare your shrimp
  3. Angel Hair takes about 7 minutes to cook - so as your shrimp starts to turn pink - add the pasta
Shrimp
  1. In a large saute pan add the following:
  2. Add a good coating of olive oil (about 3 Tbsp.)
  3. Add about 4 nice sized pats of butter (I say 4....but I used closer to 6 - I like butter!)
  4. Also add your garlic 
  5. Now turn the pan onto a medium high heat 
  6. For this I like cooking the garlic in the oil gradually so the flavor infuses more
  7. Once the butter melts and the garlic starts to brown - add the wine (anywhere from 1/4 - 1/2 cup)
  8. Add a large pinch of parsley
  9. Bring to a boil, then add your shrimp
  10. Continue to cook until shrimp is cooked through
Combine Pasta & Shrimp
  1. When the pasta is done, remove it from the water - RESERVE SOME OF THE PASTA WATER
  2. Add the pasta right into the saute pan with the shrimp
  3. I usually ladle about 1/4 cup of reserved pasta water into the pan
  4. Combine and serve - I usually spritz some fresh lemon over it

Sunday, February 13, 2011

On Deck this week....

I am hoping to go up to mom's and make her famous arancini (rice balls) with her.  She won't come to me because, well you know how it is when you are cooking - you want YOUR kitchen.  Making arancini really is a two person job.  Anyway - I hope it works out and I can get up there to make these this week!

I'm also planning on Roasted Fennel & White Bean Soup with some crusty bread.  A Shrimp dish (I am thinking my Shrimp Pasta Primavera)  and maybe a few more 'tea party' recipes to gear up for my party next month.

I am also VERY close to my 120 fans on facebook!  Once we reach the 120 I will giveaway the $25 Penzey's Gift Card as promised.

I hope you all had a great Valentine's Day! I had a great day with my family and a wonderful dinner hosted by a wonderful friend.

Saturday, February 12, 2011

Morrrres....

My daughter came up to me the other day and said "Mommy, can we have Morrrres"  So I asked her more of what and she replied "No, Morrrres, you know when you smoosh it together and eat it?".  Took me a minute but I figured out she was saying S'mores.  Now I don't even remember the last time we made s'mores or how she even knew what it was.  But...I figured hey - lets go with it!

So I looked in the cupboard and I had marshmallows (the kids love the mini ones as a treat) and I had chocolate chips..but no graham crackers.  I did have Ritz Crackers though.  I figured she wouldn't know the difference.

So, I took about 12 Ritz Crackers, topped them with 1 mini-marshmallow and 2 chocolate chips.  I popped them in the toaster oven and set it to toast light.  About a minute later I took them out and placed another Ritz Cracker on top, smooshed it down and Viola instant "Morrrres!".  The kids devoured them up in no time..and to be quite honest - they were yummy!

Valentine's Day Krispie Hearts!

I just had to share these adorable Rice Krispie hearts that my daughter & I made today.  She LOVES to help me in the kitchen and even has her own aprons and kitchen utensils.  I am always finding ways to let her help me make dinner or make a special treat. Well tomorrow the Valentine's Queen is coming to visit our house.  The Queen leaves a little treat for kids on Valentine's Day (just another way for us to bribe them into behaving!). So of course we just had to make a treat for her when she arrived.

I figured I would make the Rice Krispie treats into hearts and then dip them in chocolate.  My daughter could then decorate to her hearts delight!

I doubled the recipe to yield 16 small hearts and lots of left over pieces!

  • 6 Tbsp. butter
  • 2 10oz. packages of large marshmallows or 8 cups of mini-marshmallows
  • 12 cups of Rice Krispies
  1. Melt butter over low heat
  2. Once butter is completely melted, add in marshmallows
  3. Stir until marshmallows have completed melted
  4. Add Rice Krispies 
  • I buttered 2 9/12 inch aluminum trays 
  • I then split the mixture into the two pans
  • Grease your hands using butter flavored cooking spray or plan butter and pat the mixture down into the pan so it is even
  • Let it sit and cool for at least a half hour
  • Using a heart shaped cookie cutter, cut into the rice krispie treats
  • I was able to get 8 hearts out of each tray
  • Lay the hearts on waxed or parchment paper
Chocolate Dip 
  • 8 ounces milk chocolate (I used chocolate chips)
  • 1 Tbsp. shortening (ie crisco)
  1. Over a double broiler on LOW heat (or you can place metal bowl into a small saucepan) combine chocolate and shortening
  2. Stir until completely melted

I covered half of my hearts then let my daughter sprinkle them with various decorations.  Set back on wax paper to cool

Apricot Scones with Mock Clotted Cream

I love Tea...wait, let me clarify, I love the food that is served at Tea.  Those delicate Cucumber Sandwiches, the light and delicious quiches, the Scones, the fragrant teas, the Scones...wait did I say Scones twice?  Yes!   I REALLY love scones.  Or maybe it's the mock clotted cream that I smother my scones in..but either way, I love them.

I had gone to Tea not to long ago with two of my girlfriends and had an apricot scone.  I made a mental note to come home and find a recipe for them.  So I searched and came across one from MyRecipes.com .  I was lucky enough to have all the ingredients on hand.  Now the problem is that this recipe yields 12....I've already eaten 3 and have tucked the rest away.  I will bring them into the office...I promise I will.

Here is a direct link to the recipe.

  • 2 1/2 cups all-purpose flour
  • 1/2 cup sugar
  • 2 tsp. baking powder
  • 1/2 tsp. baking soda
  • 1/4 tsp. salt
  • 1/4 cup chilled butter cut into pieces
  • 1/2 cup finely chopped dried apricots (I put a tiny bit of flour in the bowl I put them in so they wouldn't stick together)
  • 1/2 cup low-fat buttermilk
  • 2 large eggs
  • Cooking Spray
  • 2 tsp. sugar
  • 1/2 tsp. ground cinnamon
  1. Preheat oven to 400 degrees
  2. Combine flour & the next 4 ingredients (flour through salt)
  3. Cut in butter with a pastry blender or 2 knives until the mixture resembles coarse meal )I just used my kitchen aid mixer)
  4. Stir in the apricots
  5. Combine the buttermilk and eggs, stirring with a whisk
  6. Add to flour mixture, stirring just until moist (dough will be sticky)
  7. Turn dough out onto lightly floured surface; knead lightly 4 times
  8. Pat dough into a 9-inch circle on a baking sheet coated with cooking spray
  9. Cut dough into 12 wedges, cutting into but not through the dough
  10. Combine 2 tsp. sugar and the cinnamon, sprinkle over dough
  11. Bake at 400 degrees for 20 minutes or until golden
  12. Serve warm


Mock Clotted Cream

Now this was a little harder to come by...there are a TON of recipes for it online.  From what I've been told true clotted cream is more on the bitter/sour side like sour cream.  The Mock Clotted Cream I've had has always been sweet, like whipped cream.  I really had nothing to go by...so I combined a few different recipes and what I came up with was pretty good.  This uses sour cream although I did see some recipes that called for cream cheese (I assume that would yeild a sweeter cream)
  • 1/2 cup sour cream
  • 1/2 tsp. vanilla
  • 3/4 cup heavy cream
  • 3 Tbsp. confectioner's sugar (I would probably use 1 more Tbsp. next time)
  1. Combine sour cream and vanilla in a small bowl
  2. In a mixing bowl whip the heavy cream until it starts to form peaks
  3. Fold the sour cream mixture into the heavy cream gently
  4. Sprinkle in the confectioner's sugar
  5. Serve alongside scone...my kids also loved dipping fresh strawberries in it!


Thursday, February 10, 2011

I am taking a break.....

And giving my husband the chance to share some of his great cooking with you!  One of the things I love about my husband is that he can cook...he can really cook.  He loves using vegetables and spices.  Things that used to scare me before!  He has been a little MIA in the kitchen since he's so busy with work or spending time with the kids when he gets home.  But tomorrow he will be cooking up dinner!  He's great with fish so I'm excited to see what he decides to make us!

Chicken Challenge! Creamy Dijon Chicken

I had participated in Lisa's Chicken Cooking Challenge from Lisa's Cooking Adventures a few weeks ago.  I made Coconut Chicken Fingers which were AMAZING! Lisa was still looking for some guest bloggers to make some more of the chicken recipes featured in the Cooking Light article.  I took a look and found a recipe for Creamy Dijon Chicken.  It seemed easy enough and a quick mid-week meal.  I have to say it was easy and tasty.  I served it to my husband , my brother, his wife and my kids. There were no complaints..but no WOW's either. The cream sauce is very light which was good..but I think I would have liked it more if it was a little thicker...but I guess it wouldn't be light then. I would probably make this again, but tweak it a bit adding a few more spices and maybe a little more cream.

Here is the link to the Cooking Light article with recipe.

  • 4 Skinless, boneless chicken breasts (I use Perdue thin-sliced chicken breast)
  • 1/2 tsp. Salt
  • 1/4 tsp. Pepper
  • 1 Tbsp. Olive Oil
  • 3 Tbsp. Chopped shallots
  • 1/2 cup lower sodium, fat free chicken broth (I made my own using a bouillon cube)
  • 1 Rosemary spring (I used 1 tsp. dried rosemary)
  • 3 Tbsp. Whipping cream
  • 2 tsp. Dijon mustard
  1. Place chicken breast halves between 2 sheets of plastic wrap; pound to 1/2-inch thickness (I had thin sliced so skipped this step)
  2. Sprinkle chicken with salt and pepper
  3. Heat large skillet over medium-high heat
  4. Add olive oil to pan
  5. Add chicken; saute 3 minutes on each side or until done
  6. Transfer to serving platter
  7. Add shallots to pan; saute for 2 minutes
  8. Stir in chicken broth and rosemary spring
  9. Bring to boil
  10. Cook 2 minutes
  11. Stir in whipping cream; cook 2 minutes
  12. Remove from heat, and discard rosemary
  13. Stir in Dijon mustard
  14. Spoon over chicken
I didn't get a great picture of the chicken (It actually didn't really look like much) but...you can see it in the upper right hand corner.  I served it with glazed carrots, my simple risotto & nonna's seasoned bread)


Aunt Janet's Coffee Cake

I was so excited when Janet said I could make and blog her recipe for Coffee Cake.  Janet married my cousin a little over a year ago. She is not my aunt..but my kids call her Aunt Janet, my aunt - her mother in law, calls her Janetta and my mother calls her Jen or Janetta.  Who knew when Aunt Janet joined the family we would gain a family baker.  Not one family gathering goes by without some homemade dessert, cookie, pie, etc...from Aunt Janet. This coffee cake is phenomenal!  I suggested that Aunt Janet add a banana to this..but she quickly nixed that idea.  I had banana's..but stuck with the original recipe, this time.

Cinnamon Mixture
  • 1/2 cup Mini chocolate chips
  • 1/2 cup Chopped walnuts
  • 2 tsp. Cinnamon
  • 1/2 cup Sugar
Cake
  • 2 sticks of butter, softened
  • 1 1/2 cups Sugar
  • 4 eggs
  • 1/2 pint sour cream
  • 1 tsp. vanilla
  • 3 cups flour
  • 1/2 tsp. salt
  • 3 tsp. baking powder
  • 1 tsp. baking soda
  1. Preheat oven to 350 degrees
  2. In small bowl, combine all the ingredients for the Cinnamon Mixture and set aside
  3. In medium bowl, combine flour, salt, baking powder and baking soda - stir to mix
  4. In large bowl or Kitchen Aide mixer, cream butter
  5. Add 1 1/2 cups sugar to the butter
  6. Add eggs, one at a time making sure each is incorporated
  7. Add Vanilla
  8. Add sour cream - alternating with flour mixture (so a little sour cream, a little flour, then some more sour cream, then flour, continue till you have added them both)
  9. Pour half dough in a greased tube pan (I did not have a tube pan so I used a well greased bundt pan)
  10. Sprinkle 1/2 your cinnamon mixture on top
  11. Pour the other half of the dough on top (I did this in smaller spoonfuls and then spread it - the dough is thick and a little sticky)
  12. Top with remaining cinnamon mixture
  13. Bake for 1 hour or until toothpick comes out clean


Recipe Challenge! Parmesan Crusted Chicken

I am taking part in a few cooking 'challenges' one of them was for a quick weeknight dinner idea.  I got to submit my own recipe for the challenge.  I submitted my stuffed pork chops.  For this challenge I got Parmesan Crusted Chicken. When I saw the recipe I thought, wow this looks EASY! Which of course is perfect for a weeknight.  I will say I was a little leery of the mayo/cheese spread that was put on the chicken - but in the end you wouldn't even know that there was mayo in it.  Very tasty, the chicken was juicy and the Parmesan crust was delicious.  My kids and I had it for lunch along with an arugula salad.

Here is the recipe I was given:
  • 1/2 cup Hellmann's Mayonnaise
  • 1/4 cup Grated Parmesan cheese
  • 4 boneless, skinless chicken breast halves (about 1-1/4 lbs.) - I used Perdue Thin Sliced
  • 4 tsp. Italian seasoned dry bread crumbs
  1.  Preheat oven to 425 degrees
  2. Combine Mayonnaise with cheese in a medium bowl
  3. Arrange chicken on baking pan
  4. Evenly top with mayonnaise mixture
  5. Sprinkle with bread crumbs
  6. Bake 20 minutes or until chicken is cooked through
The only thing I did different was to season the chicken with salt & pepper before adding the mayonnaise mixture.  But I will tell you these are REALLY good and will definitely find their spot on my dinner rotation.  I work so this is the perfect go to dinner!


Tuesday, February 8, 2011

106 Likes and only 7 Comments?

First of all - thank you ALL so much for taking time to humor me on this challenge and for spreading the word!  But I still need 120 for this giveaway to happen.... and we need them by tomorrow.  I also want you to WIN!!! So if you liked me on facebook but haven't commented on my blog - do it... NOW :-)  This Penzey's Gift Card is a great way to spruce up your spice cabinet....for Free!

CLICK HERE TO COMMENT....CLICK HERE TO COMMENT.....

Cooking Challenges!

I have two Cooking Challenges I am participating in!  They both involve chicken and the recipes seem easy and perfect for a busy mom!  The first is Creamy Dijon Chicken and the second is Parmesan Crusted Chicken.  I've had the Parmesan Crusted before..but I will be using a new recipe.  I also have Aunt Janet's Supreme Delicious Coffee Cake up on deck for this week.

Aunt Janet joined the family in 2009 and we couldn't be happier.  She is now our official baker and NOTHING compares to her home cooked delicacies!

Sunday, February 6, 2011

Patate Fritte - Fried Potatoes.

This is one of my families go to dishes when we need a quick side dish, or an easy lunch.  My mom still makes this dish for my dad - very simple, very tasty.
  • 1 Potato per person - cut potato in half and then slice into thin pieces
  • 1/2 Large onion (more or less depending on your taste)
  • Olive Oil
  • Salt
  • Pepper
  1. Drizzle large frying pan with olive oil (enough to cover the bottom)
  2. Once the oil gets hot, add your potatoes
  3. Season with Salt & Pepper
  4. About half way through, add your onions (you may end up burning them if you add them too early)
  5. When the potatoes are nice and brown, remove from heat and serve
  6. Another variation is to add 1-2 beaten eggs into the pan towards the end making it a very quick frittata!


Friday, February 4, 2011

My First Giveaway!

A Big Thanks to all my facebook fans!  You got me up to 50 fans!  Now...for the big Giveaway announcment...

I am giving away a $25 Gift Certificate to Penzys Spices!  You can view their catalog by clicking here .  I Love their spices and use them almost daily!

Here is what you need to do:

  1. Go to my Facebook Page and LIKE me!
  2. Share me on your Facebook Page
  3. Leave a comment on this page telling me what your favorite Spice is and that you've done steps1&2
Once I reach at least 120 fans on my facebook page a will pick a winner at random using random.org (contest will end on 2/9/11)

Now...go spread the word!!!

Thursday, February 3, 2011

Pasta con Ricotta e Piselli

Translated - Pasta with Ricotta & Peas
EXTREMELY SIMPLE yet so tasty! Now I used to hate peas...I would only eat them frozen, right out of the box from the freezer. But once my mom cooked them..no way was I eating them.  Then, one day when I was much older I tied them ..and guess what - yes I liked them!  They were so sweet and delicious.  I couldn't believe what I was missing all this time!  This recipe is so simple and rustic.  I hope you enjoy it as much as I do!
  • 1 Box of Frozen Peas (never ever use canned peas)
  • 1 small onion or 1/2 large onion diced
  • 1 pint Ricotta Cheese
  • 1 lb small pasta such as Ditalini
  • Olive Oil
  • Salt
  • Pepper
  1. In a heated sauce pan drizzle enough olive oil to coat the bottom of the pan
  2. Add onions, salt and pepper and saute until golden brown
  3. Add peas and a little more pepper
  4. Add approx. 1/2 cup of water and simmer on low for about 20 minutes being careful that you don't  scorch the pan (check on it periodically to see if it needs more water)
  5. Cover and set pan aside
  6. Prepare your pasta according to package instructions, drain reserving 1/2 the liquid
  7. Pour your pasta into a large serving bowl 
  8. Stir in the peas and a little bit of water so as not to dry out the pasta - you will have to eyeball this - you want to have enough liquid to keep everything moist but not so much that it's swimming in water
  9. I usually keep a small bowl of reserved pasta water on the table so you can add more if needed 
  10. Serve with a dollop of ricotta cheese

Enjoy!


Wednesday, February 2, 2011

Another Food Challenge!

Last week I participated in Lisa Cooking Adventures Chicken 25 Ways Challenge. If you missed it, you can find it by clicking here!

Well, there are still a few recipes left..so I asked Lisa if I could pick up one more.  So, this week I will be making Creamy Chicken Dijon!   I am looking forward to trying this dish as I can always use a new way to make chicken!

Tuesday, February 1, 2011

Nonna's Simple Seasoned Bread

My earliest memory of this bread was during one of our trips to visit my nonna in Sicily.  Her neighbor, Vita, had a huge cement oven - in her home.  Yes..this thing is HUGE and in her home - it's purpose was making bread.  The smell of that bread, lets just say heaven.  I remember Vita bringing over some fresh HOT bread.  My mom sliced it open, drizzled some Extra Virgin Olive Oil on it, salted it and sprinkled with oregano.  I cannot begin to give you enough adjectives to describe how AMAZING it tasted.

My mom makes this bread alot..and it gets devoured before dinner is even served. She will usually make it using a long loaf of bakery quality (Calandra's, Anthony & Sons, etc.) French bread. Now, we don't have a big cement oven or homemade olive oil, but I do have some of my grandmother's oregano!  I enjoy making this from time to time - goes perfect with Pasta & Soup!

  • Loaf of bakery quality French bread (can also use individual slices of panella bread)
  • Oregano
  • Salt
  • Extra Virgin Olive Oil
  1. Place bread in pre-heated oven
  2. Remove bread once the bread gets nice and toasted - about 5-7 minutes
  3. While bread is still hot, slice the bread down the middle (I usually place a dishtowel over the bread as I slice)
  4. Drizzle Olive Oil on both sides of the bread
  5. Sprinkle with Salt and Oregano (I prefer mine extra salty!)
  6. Bring pieces of bread together and press down
  7. Cut into smaller serving pieces
  8. Enjoy!


If you make this using sliced panella bread, you can just put the bread in your toaster, toast and season

Nonna's Chicken Soup

My mom's chicken soup is the best...hands down!  But...it takes a while...like a few hours.  I can't tell you what warm memories this chicken soup brings back.  My mom has one of those huge white enamel stock pots and would make enough to freeze for future use. I've only made her chicken soup one time before and as with almost everything my mom makes - I still can't make it quite like hers. But this time..I got it!

Again, a few steps and some time involved here...but as with good home-cooking, the result is fabulous!

1 Whole Chicken
1 Large tomato or 2 smaller tomato's, cut in half
2 celery stalks, sliced in thirds
2 whole carrots, cleaned and sliced in half
1 medium onion, quartered
1/4 lemon
Parsley
1 Chicken Bouillon Cube
Bay Leaf
Salt
Pepper

Chicken Preparation

  • Trim excess fat from chicken (usually trim near the open cavity)
  • If your chicken has the innards in the cavity - remove them
  • In a bowl, rinse your chicken off
  • Now, my mom will usually let it sit in little water with lemon in it - she has this thing about lemon removing the 'poultry' taste from it...she does this regardless of how she cooks her chicken it always gets a 'lemon' bath prior to cooking
  • Rinse of your chicken, sprinkle with salt and pepper and put it in a stock pot
  • Cover chicken entirely with water and add about 2 cups more
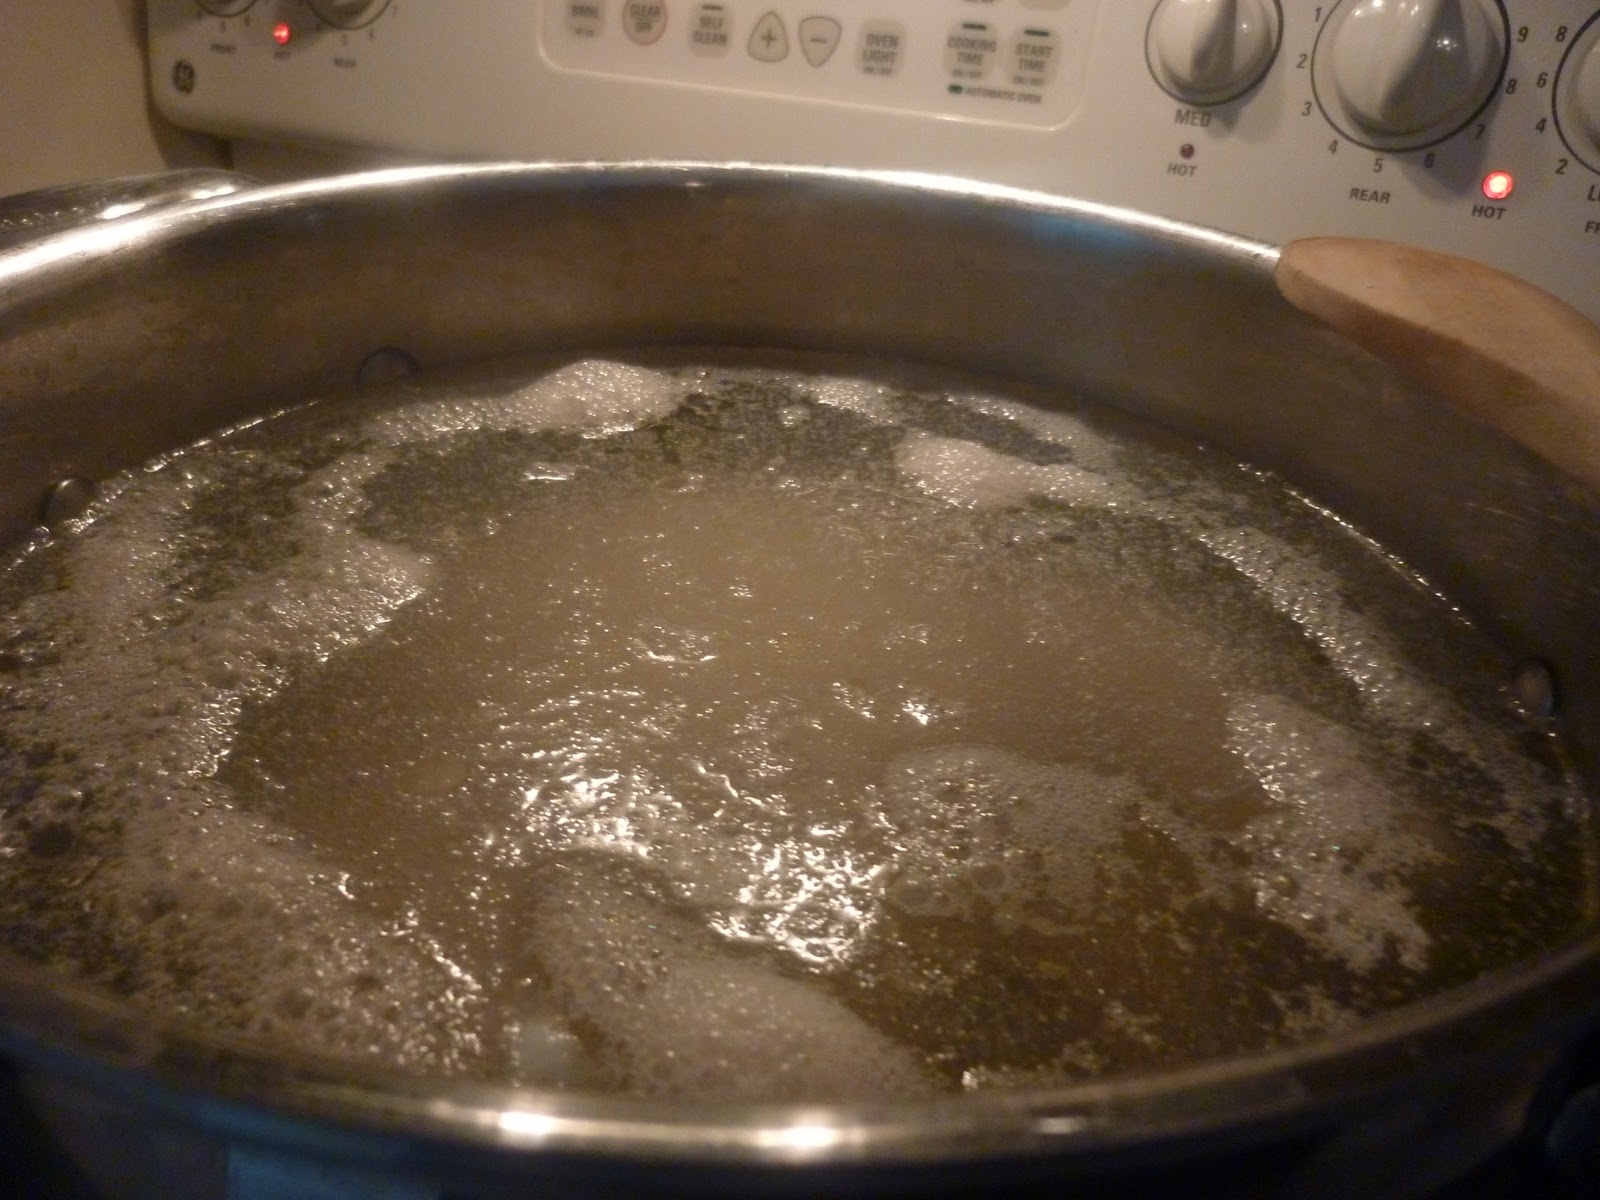
  • Soup should remain on medium low heat - AT ALL TIMES
  • Do not add anything to your pot at this time - just the chicken
  • Simmer your chicken, you will start to notice a foam collecting at the top, my mother called this 'scumazza' or foam


  • You will periodically skim this off - whatever this is, you don't want it in your soup
  • Once you notice almost no more 'scumazza' you can start adding your vegetables
Soup Preparation
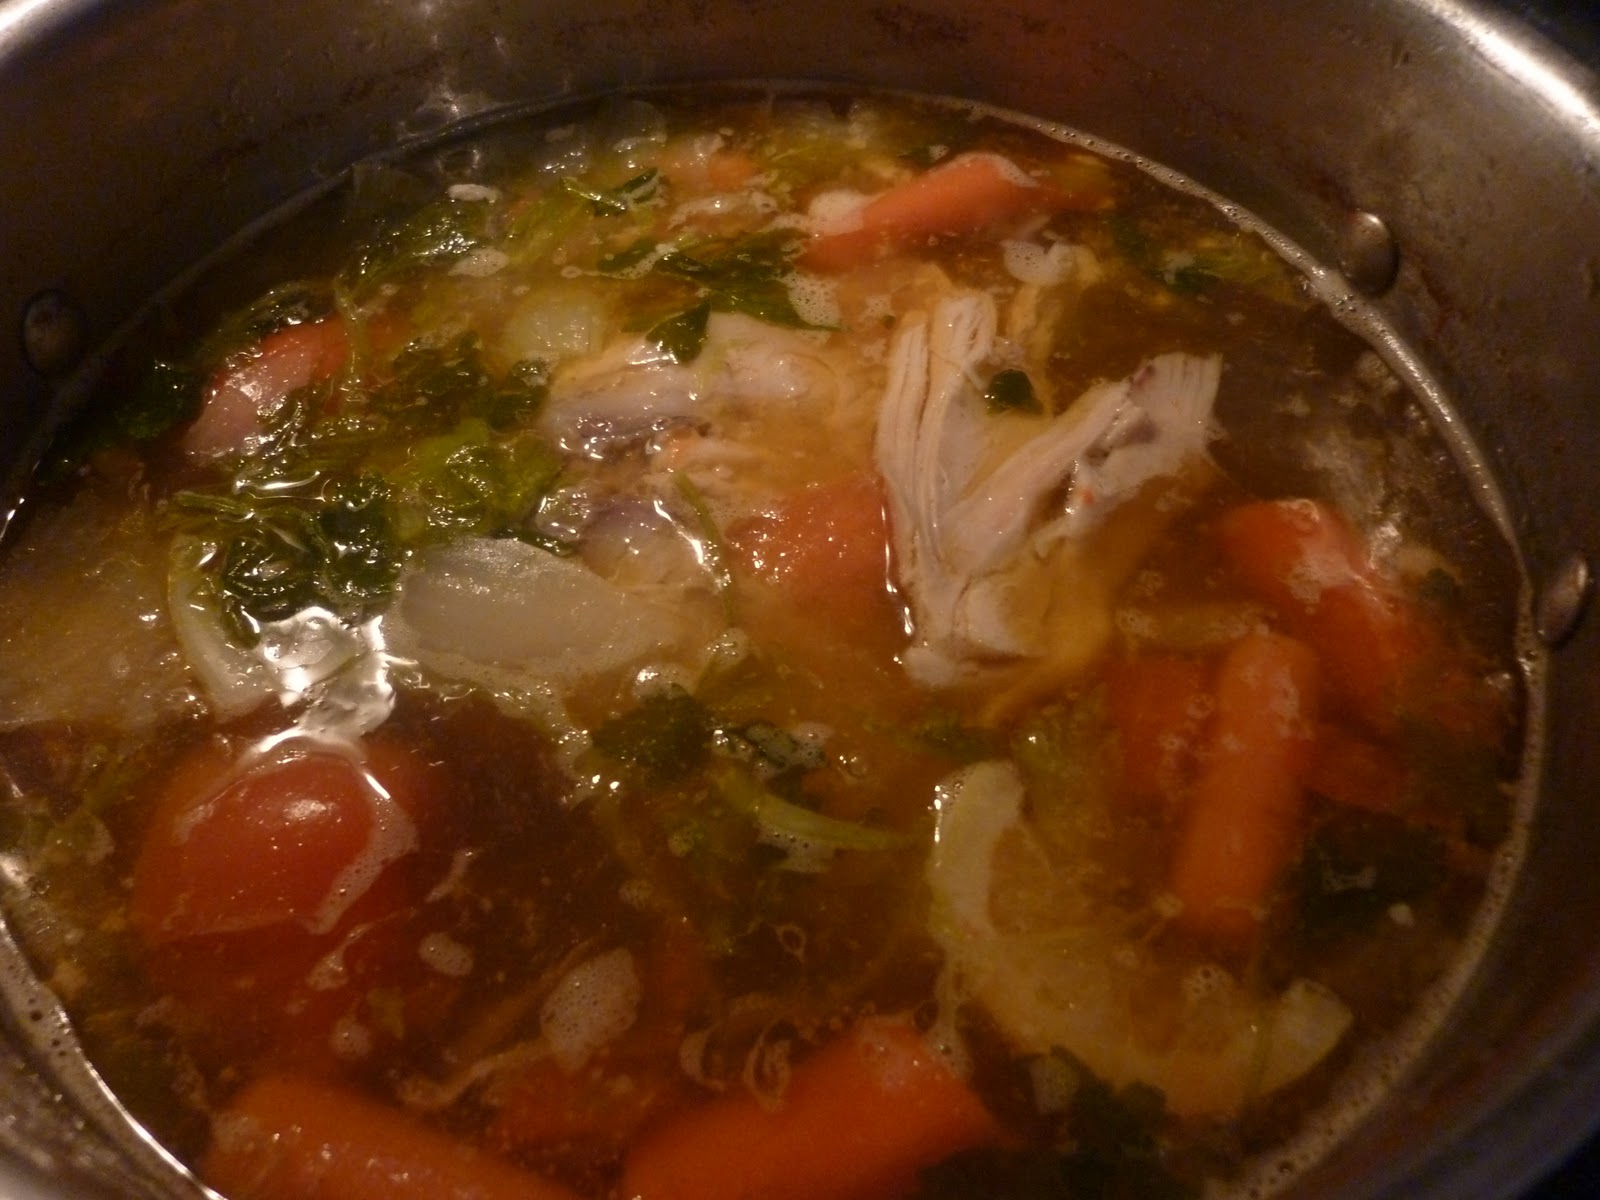
  • Add all remaining ingredients to the pot including a little extra salt and pepper
  • Simmer for at least an hour, closer to 2 would be ideal!! 
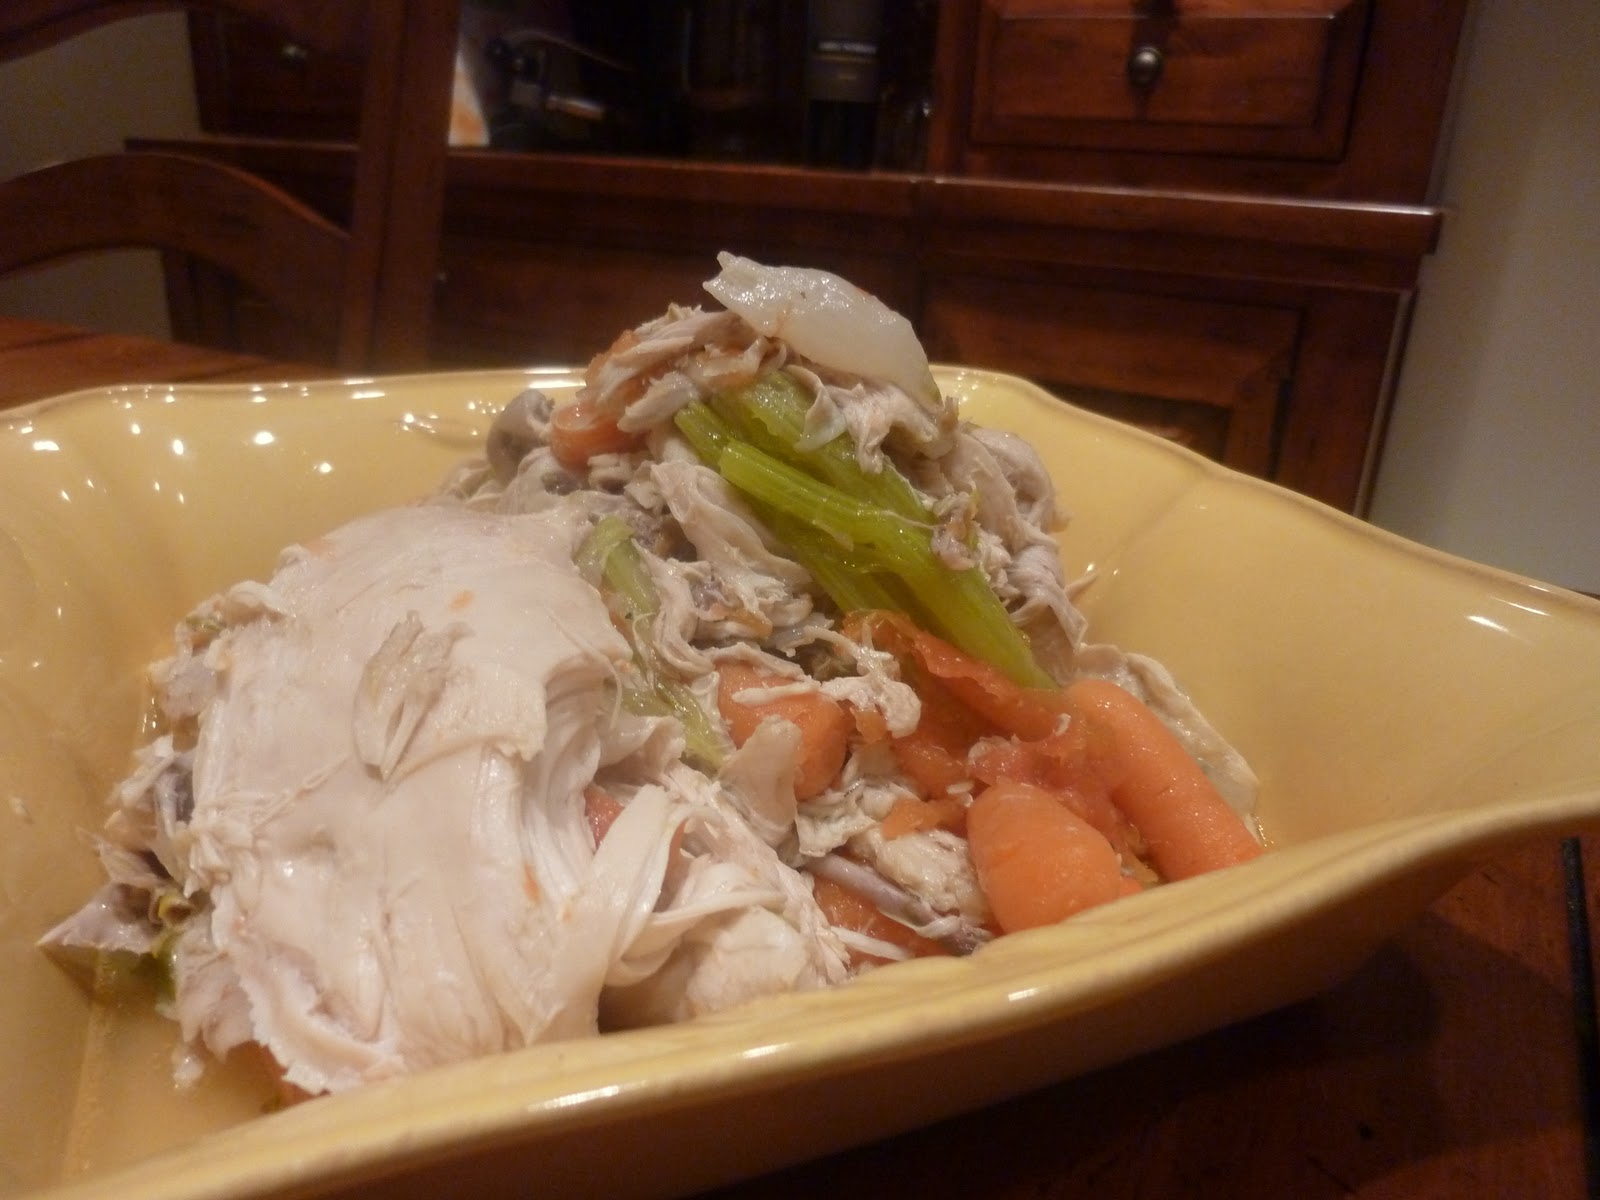
  • This is what your pot should look like:

  • The chicken should be coming off the bone at this point
  • You can now start to remove any floating pieces of skin plus the skin that is on the chicken will come off very easy at this point - it's not that bad, really it isn't  :-)
Serving Your Soup
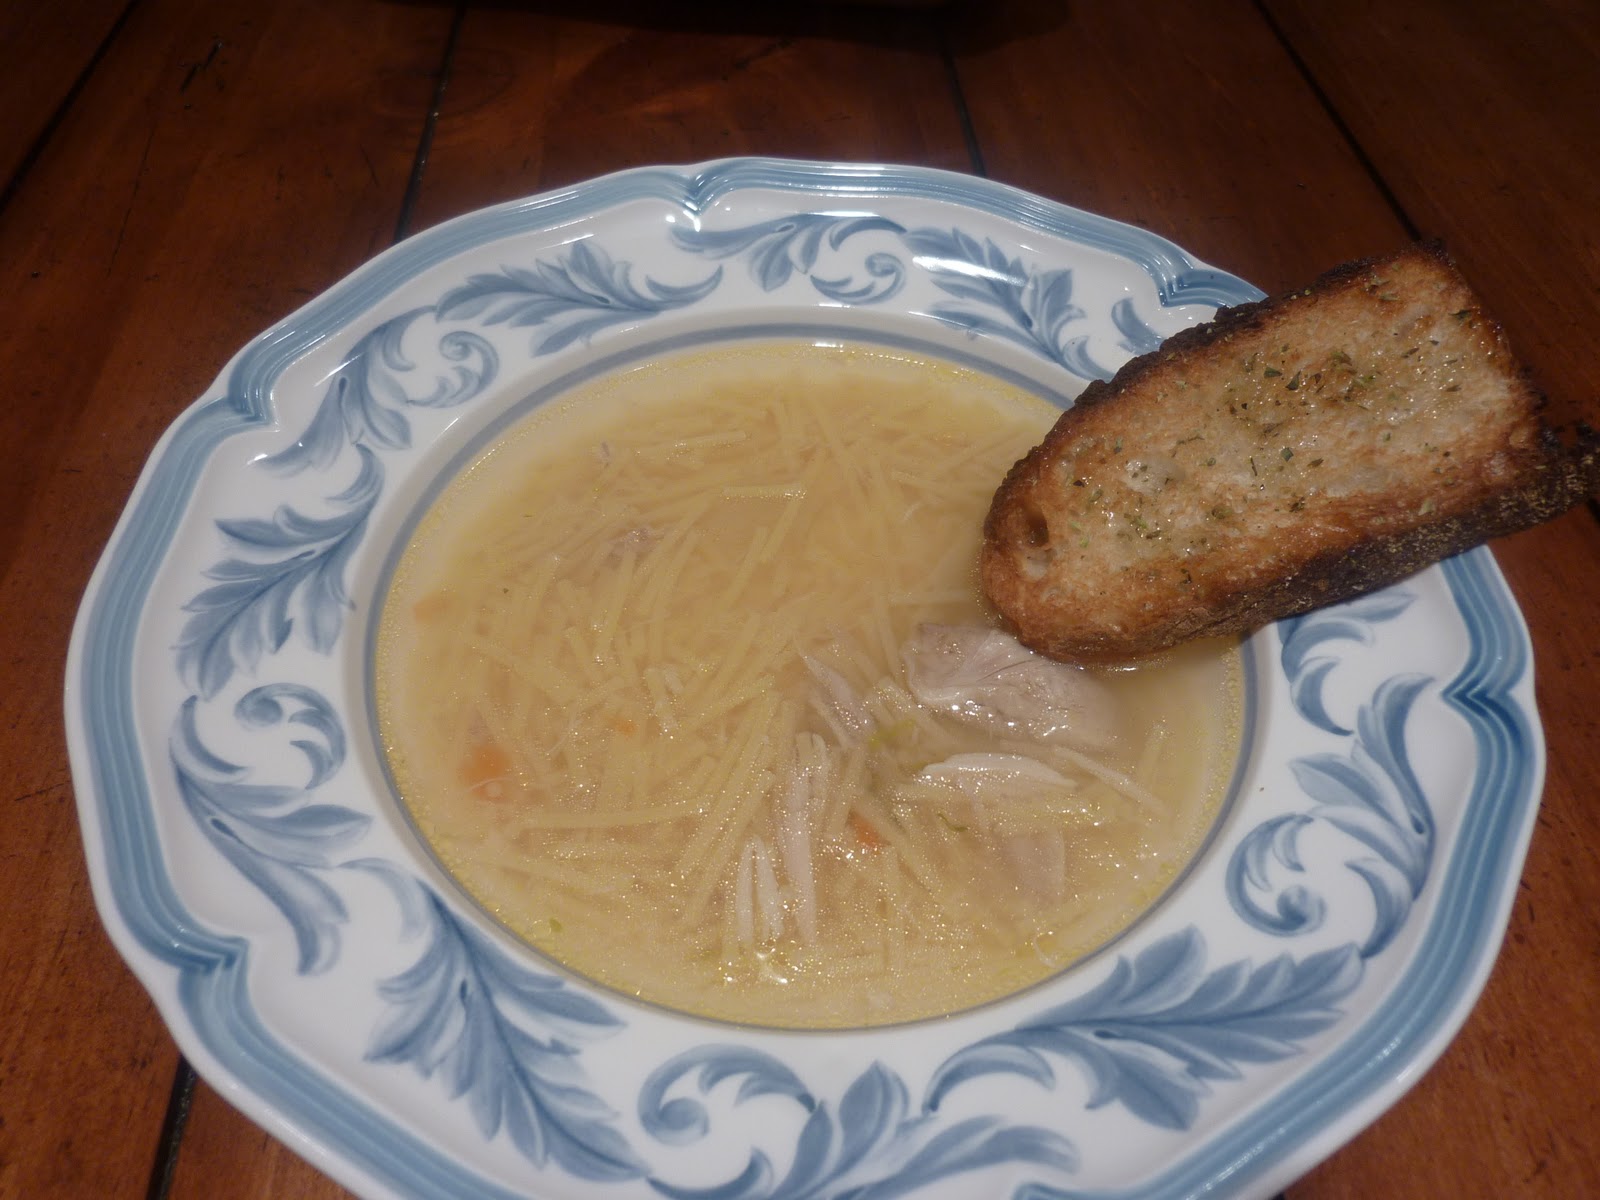
  • Place a colander over a separate stove top pan on medium heat
  • Add your chicken broth into the pan, the colander will catch all the vegetables
  • Add enough broth to serve you, your family, your friends, etc
  • When broth comes to a boil, add your pasta - ditalini, broken spaghetti, orzo, etc..
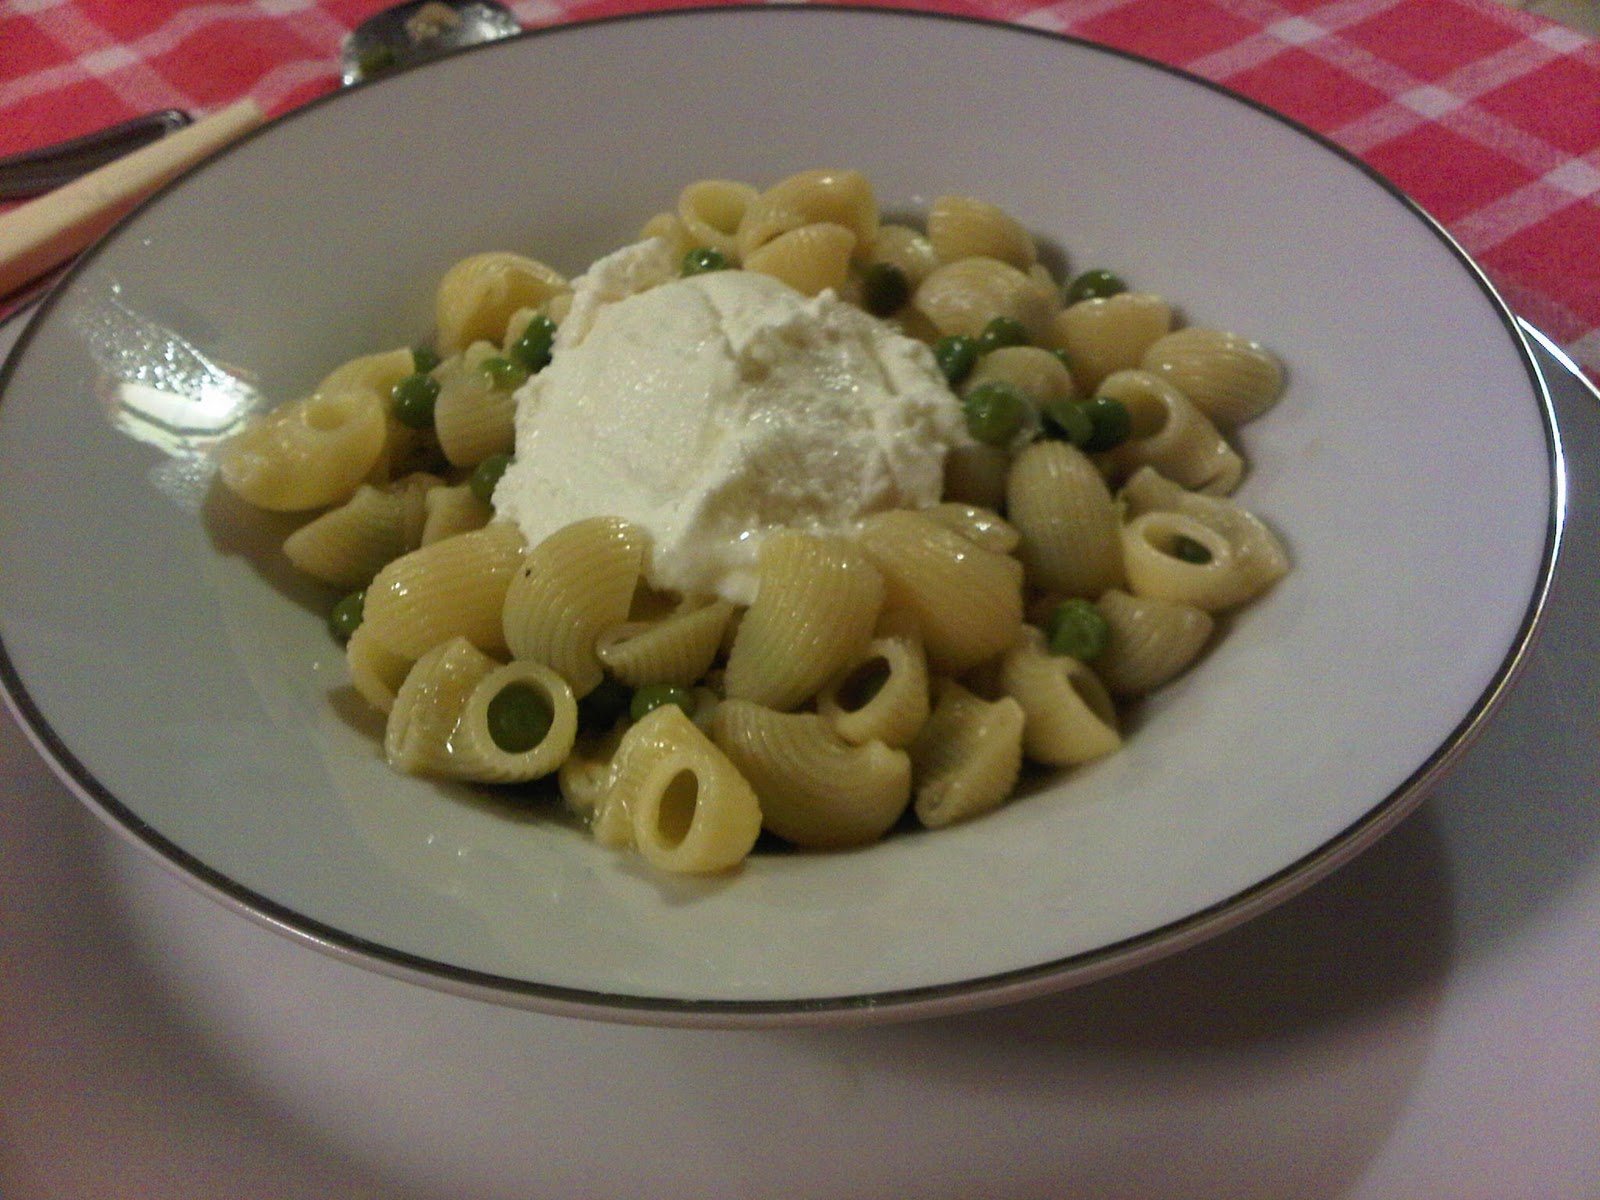
  • My mom served the chicken and vegetables in a separate bowl along side with the soup - this way you could add however much chicken and/or vegetables you wanted to into your soup
I hope I didn't make this more involved than it really is..because although it may seem like it's complicated - it's not.  If you have any questions, please let me know and I'll be happy to help!

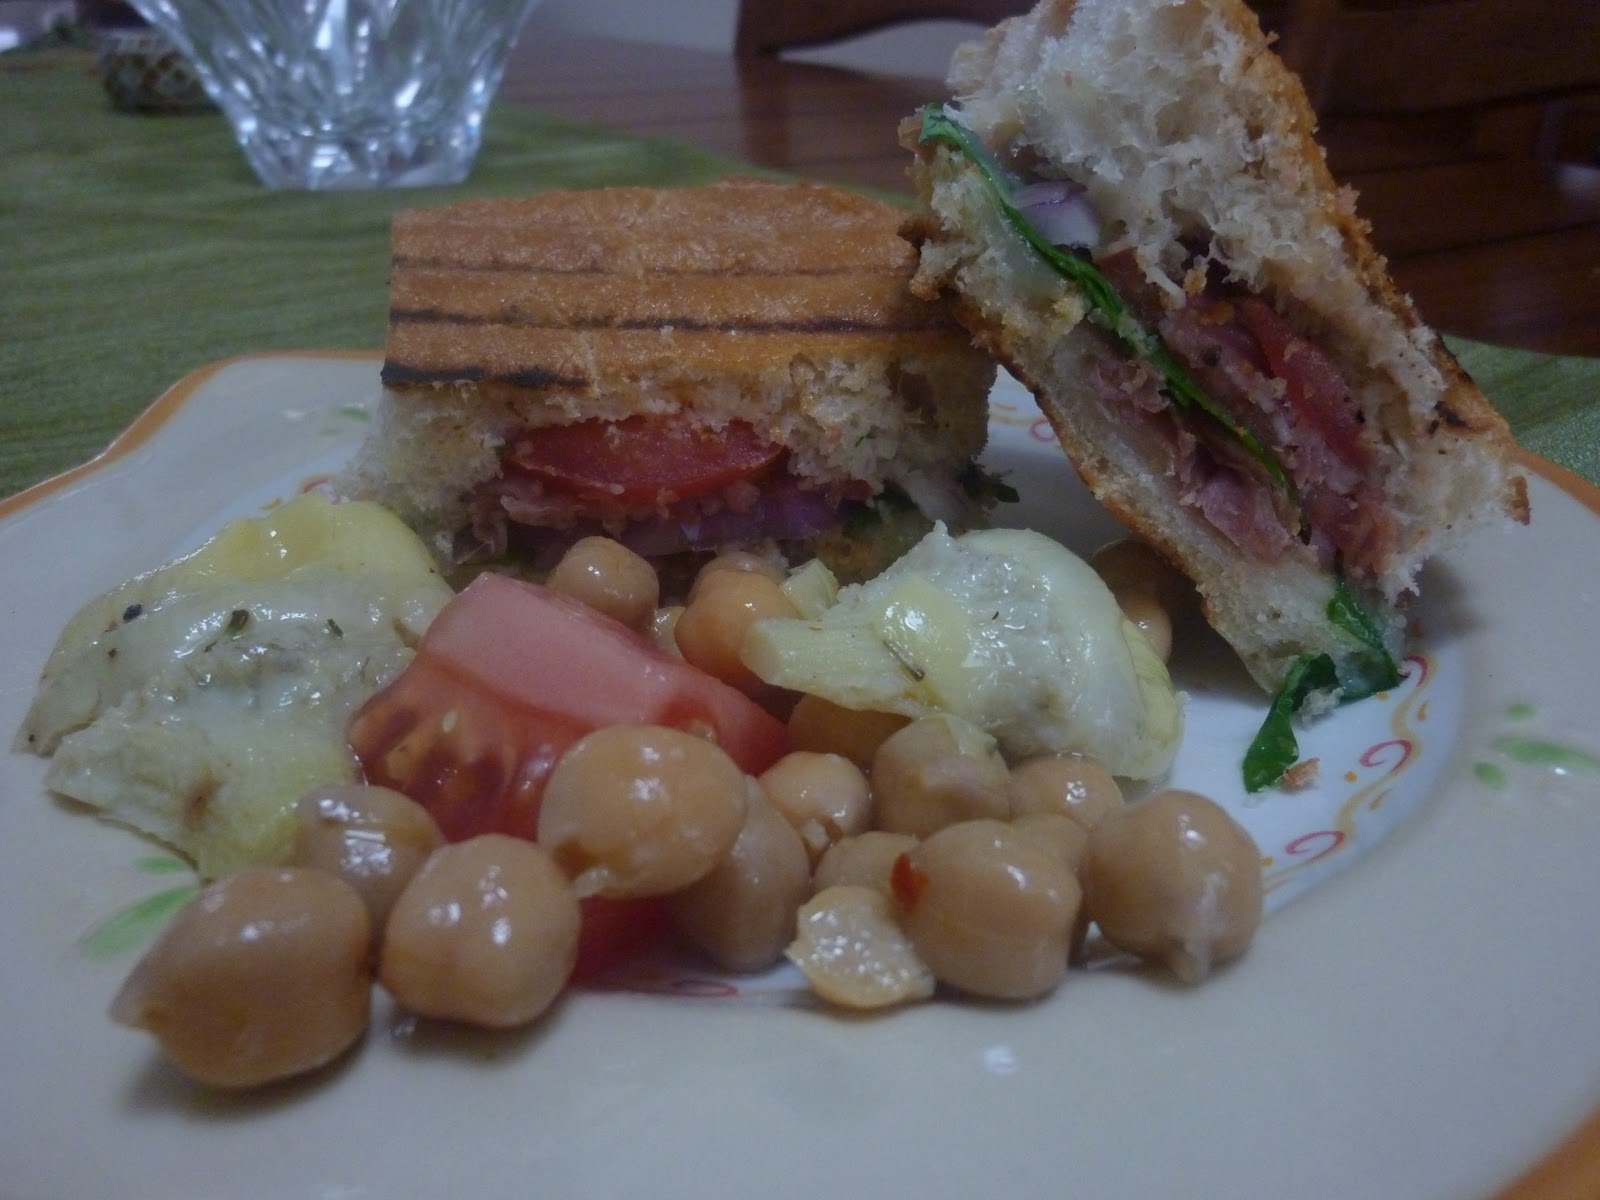
I served this another one of my mom's other favorites - her seasoned bread which I will write about later!


Alex's Perfect Panini

So, I still had some leftover ciabatta bread and figured I would make us some grilled panini for lunch today.  Alex will eat just about anything...except for creamed corn, don't ask.  I looked in the refrigerator and had some proscuitto, cheese and vegetables put it all together and Alex's Perfect Panini was born!
  • 2 slices Ciabatta bread
  • 3-4 thin slices of Proscuitto
  • 2-3 slices of Provolone or fresh Mozzarella cheese
  • Arugula
  • Sliced Tomato
  • Sliced Red Onion
  • Olive Oil
  • Salt 
  • Pepper
  • Oregano
  • Grill Pan
  1. Heat Grill Pan on stovetop
  2. Lightly drizzle some Olive Oil on both pieces of bread
  3. Sprinkle bread with salt, pepper and oregano
  4. Layer your sandwich as you like - some like cheese on the bread first, some the meat, others vegetable
  5. I wiped my grill pan down with olive oil
  6. Place finished sandwich on your grill pan - now if you have a panini maker you are GOLDEN - I do no.  So, I took a heavy saucepan and placed it right ontop of my sandwich - Presto!  Instant Panini Press!
  7. Turn the panini over, put your saucepan on it to get grill marks on both sides
  8. Serve with salad, chips, whatever